Click on HOME to see most recent posts!

Place a Stampin' Up order with me and get a
FREE TUTORIAL OF YOUR CHOICE for every $50 that you spend!
Showing posts with label Easter. Show all posts

Thursday, March 12, 2015

Eggcelent Box & Chick Cards

Align Center
This is the perfect gift to give anyone, big or small, for Easter!
This would also be a great gift for someone who just had a baby. You could add pink bows for a girl or blue bow ties for a boy!
The egg box flips up to open and fits three chick cards with 3” x 3” envelopes or more.
You do not need 12” x 12” paper for this project, only 8 ½” x 11”!

CLICK HERE to get the directions for this project!

Saturday, April 23, 2011

Easter Eggs - A New Way to Decorate!


Here is a new twist on decorating Easter eggs! We did this with Timmy and Dylan(my nephew in middle) who are three and Ashley who is five. They had a blast! Above they are having their bees fly around. Below we have our pigs, owl, skunk and cat!
It's just cut pieces of scrap paper stuck on with craft glue. The rest is a permanent black marker.


Thursday, March 31, 2011

Planter Six Pack


I love Spring! I love going into the stores and seeing all the gardening stuff and I can't wait for our weather to get warmer so I can start playing in my garden. Until then, I guess I'll just have to make projects with the stuff...
I saw these little planter packs at Target, they are $1 each in the front section of the store (about 2" wide). They come with a little planter vase, seed packet and peat pellet. You can get flower ones or herbs. (Or you could just put together your own with little vases or already grown flowers!)
I could not help myself but to make my Six Pack Project with these little planters! This would be such a great gift for a gardener or just someone who cooks and likes to use fresh herbs. You could even give this as a gift with some recipe cards!
I Love Spring!

to see the details for the original project that I used!


For these planter six packs I used the following stamps and supplies along with the Six Pack tutorial:
Fast & Fabulous or Just Believe
Basic Pearl Jewels
Punch Pack
Blender Pens

The colors are:
Old Olive, Concord Crush, Whisper White, Bashful Blue
or
Early Espresso, Crumb Cake, Cherry Cobbler, Always Artichoke, Whisper White

Thursday, March 24, 2011

Easter Egg Gift Card Holder


Here is my Easter Egg Gift Card Holder! You can use whatever you want to decorate your egg card and put either a gift card or money in the inside.
When you pull up the top of the egg, the gift card rises with it!

The perfect way to give a gift for Easter!

CLICK HERE
to see more details or purchase the tutorial!

Saturday, March 5, 2011

Past Easter Projects

Life has been a little busy for me lately (busy but good!) and I have not been able to get many projects done. I have been doing a lot with raising money for JDRF for Diabetes.
I thought since I seem to be at a slow point, I would post some older projects for inspiration. Here they are!
New stuff will be posted soon thought so keep checking back!

CLICK HERE for more details!

CLICK HERE for more details!

CLICK HERE for more details!


CLICK HERE for more details!

Monday, January 24, 2011

Punch Art Mini Calla Lilies

Sorry for my lack of posting lately, I have been working full time for our Downhill for Diabetes ski and snowboard event that is next month!
My mom came to visit last week and brought her new Blossom Petals punch from the Occasions Mini Catalog! I love this punch and I can't wait to get mine! You have already seen my large punched Calla Lilies that I made with this punch and here are mini ones using the same technique!
I used the Easter Blossoms stamp set for the sentiment with the Large Oval punch and Scallop Oval Punch.

You can see how I made the larger calla lilies HERE shown below. The only difference with these smaller ones, are that I used the two smaller sized punched pieces on the same punch!

Sunday, January 16, 2011

Punch Art Calla Lilies


Sorry for my lack of posting lately, I have been working full time for our Downhill for Diabetes ski and snowboard event that is next month!
My mom came to visit and brought her new Blossom Petals punch from the Occasions Mini Catalog! I love this punch and I can't wait to get mine! Here are my punch art Calla Lilies that I made with it!
I used the Easter Blossoms stamp set for the sentiment with the Large Oval punch, Modern Label punch and Decorative Label punch.

Here is how I made them:
I punched the petals out of Whisper White card stock using the Blossoms Petal punch. These are the two largest sized petals.


I trimmed the scallops off the top of the largest petal and sponged them all with Sahara Sand ink.


I cut the stamen freehand out of Daffodil Delight card stock. I put this on with a dimensional and then one of the petals over it. I put a dimensional under the middle of the top petal and glued the pointed tip down with Tombow adhesive so it wouldn't pop up.


I did the same thing with the top petal.


I then sponged the bottom of the flower with Wild Wasabi ink and cut the stem freehand out of Wild Wasabi paper. The leaves are punched out and sponged. Your calla lily is finished!

Tuesday, August 10, 2010

Chicks Card - Punch Art

Here is my Baby Chicks and Mommy card. I used the Bird punch and the Owl Punch to make the chicks on this card. I used the Inspired by Nature stamp set for the grass. I wrote up a mini tutorial to explain how!
This card really reminds me of my two chickies following me around everywhere I go! They keep asking me who the third kid is... so cute!
You can download and print it for FREE below!

Chicks Card Tutorial

Thursday, March 25, 2010

Big Shot Die - Half-cut Technique with Top Note!


This is another half-cut technique(scroll to the bottom for the link to the scallop circle tutorial) using the Big Shot. This time I used the Top Note die!!
Here is how to do this.

Cut out an 8 1/2" x 5 1/2" paper and fold it in half to make the standard sized card. On the front of the card you are going to mark lightly in pencil the halfway points like shown. That would be 2 1/8" the short way and 2 3/4" the long way.
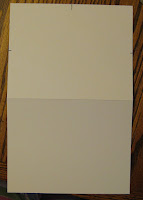

I have used my white gel pen to mark the center points on all of my dies. It makes it much easier to line everything up and does not come off on your paper.
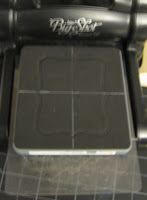

You are going to put your paper in and line up the 2 1/8" marks with one white line and the top center mark with the other center line. This centers the Top Note image in the center of your card.
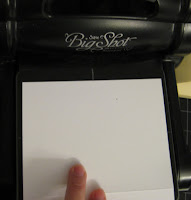

Put your top cutting plate on but only up to the 2 1/8" center marks like shown. Put it through the big shot like this.
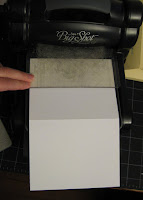

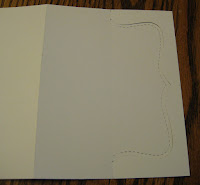
This is what you will have, a half cut top note!

Now you fold back the front part.
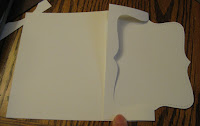

And fold the card in half. So easy!
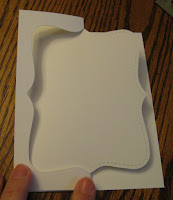

This is showing using the small end of the top note instead of the wide side. It works both ways!
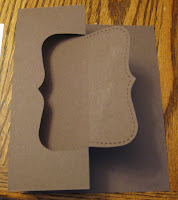

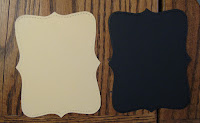
Then I cut out two more standard top note shapes. I cut one at the score marks and the other just inside the score marks to get that layered effect.

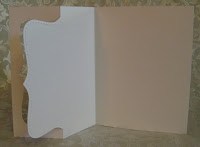
Here is what the card looks like opened on the inside.

And here is the finished card!! I used A Good Egg and Well Scripted for the saying.


CLICK HERE to see my other tutorial using the scallop circle.

Thursday, March 11, 2010

Eggs Over Easy

I was cooking eggs and thought how funny it would be to do egg cards in my big egg box that went with the chicks. These cards are 3"x3" so they will fit in the little envelopes too!
If you want to see the egg box tutorial with chicks, CLICK HERE!
If you want to see how to make the eggs(with a side of bacon!) CLICK HERE!

Easter Bunny Fancy Favor Basket!


When I case something from someone else I usually change it around a little but but this one was too perfect to change! I love it! This is by far my favorite punch art bunny that I have seen. I got this from Raidis Smet's site, Seep and Keep.
To see where I cased this idea from and get the full directions CLICK HERE!

Tuesday, March 2, 2010

Origami Flower Bouquet!

I saw on the Paper Enchantment Blog an origami flower bouquet and I just had to try it! I searched on the web and found directions to make all the flowers except one so I switched it out for another flower. This is my finished bouquet!
I started all of the flowers with 6" square pieces of Designer Series Paper (mostly from the hostess 6" paper assortment!) I got the greenery from the dollar store.
Do not start this unless you are willing to spend some time on it! These folds are tough and take a bit of time!

Here are some close up pictures and the links for the directions to all the folds!


Here is the link for the Lily


Here is the link for the Tulip


Here is the link for the daisy-like flower

If you are looking for more flower options I found a great site with lots of directions, it is just hard to tell what all the flowers will look like, here is the link for that:
A ton of origami flowers

Here is the Paper Enchantment blog where I saw these great flowers!
Related Posts with Thumbnails